Audio Interfaces: A Beginner's Guide

Discover everything you need to know about audio interfaces, including how to choose one, set up, troubleshooting and maintenance for the best sound quality.
An audio interface is an essential piece of hardware in any serious producer’s setup. If you’re looking for the right gear for your own home studio, this is one of the first things you are going to need.
In this article we’re going to explain why it's important and how it fits in with the rest of your music making hardware and software, as well as comparing a few options if you’re in the market for one.
If you're not quite ready to invest in your own music production hardware, you can book a recording studio in the UK, US or Germany with Pirate. All of Pirate's studios come with professional-grade equipment as standard, including a Focusrite audio interface.
What does an audio interface do?
An audio interface is essentially a small piece of outboard hardware that acts as the middle-man between external instruments and microphones, your preferred beatmaking software and your monitors.
Its central role is to convert these external (‘analogue’) signals into a format that your chosen DAW (digital audio workstation) can understand. From here, you can save, manipulate and export the sounds through editing and processing. Once this is processed by the computer, it also routes this audio back out to your monitor speakers. We’ll take a look at this in a bit more depth further on.
Why do you need an audio interface?
Why you need an audio interface is twofold; for high quality recording and monitoring. Its two key components are the converters and preamps, which perform different functions, but both enable you to listen and record in greater accuracy and detail.
If you plan on making a track containing your beautiful singing, sick guitar riffs or drum patterns, you’ll need something that can allow your computer to process this recorded signal. This is what the preamps are involved in: capturing high quality recordings. The external signal, or the sound you are recording, is boosted by an in-built pre-amplifier, a necessary process as the electrical signals coming in via inputs are very weak. Your only real alternative would be to record in via a mixer. Whilst this is a perfectly viable solution, it's often only engineers with more old-school/advanced music production studios who would opt for this route in their setup. If you are considering getting a mixer over an audio interface, we’ll go through the pros and cons of using an audio interface vs mixer below.
The converter on the other hand is responsible for codifying the signal into a binary code that your computer can read. Your computer’s sound card (which contains another converter) is not designed for high-end audio processing (not everyone with a laptop makes music!). If you’ve tried recording into your computer using a non-USB microphone (a mic without an in-built pre-amp) before, you’ll have found not only that the recording is coming in too quiet, but that your CPU gets maxed out quickly, potentially causing your software to crash. So routing audio through an audio interface’s sound card is essential for making and listening to music in ‘high-def’.
Audio interface vs mixer
A mixing console comes in a few various forms – Analog, digital, USB (comes with a built in audio interface) or hybrid. It effectively acts in the same capacity as your DAW – you’d have multiple channels to mix multiple tracks, with tools such as EQ and compression, though these will be a lot more limited than the number of plugins you can get on a computer. This is why mixers are often great in a live setting (not all mixers are for recording!), as you have immediate hardware control of multiple channels, allowing engineers to adapt a live show in real time, though less popular in studio setups.
The fundamental differences are:
- Size & cost. Mixers are often a lot bulkier & more expensive – it's highly likely you will not have the space or means to fit a high-end mixer capable of multi-track recording in your home studio!
- Direct monitoring. One real advantage to using an audio interface is being able to listen to your input signal with near-zero latency (the delay during which the signal processing takes place). Essentially what it allows is for you to record in ‘real time’.
- Complexity. A mixer will take some getting used to if you’re new to working with hardware. The number of knobs and buttons on it can be intimidating at first! Audio interfaces on the other hand are a lot easier to get to grips with – you can connect it to your computer and instruments and hit record pretty instantly, then use your DAW to tweak recorded sound.
Audio interface vs sound card
Sound cards are a mere component of an audio interface. Their function is to convert and play audio. An interface on the other hand allows connections to external instruments and offers phantom power, a feature required to use condenser microphones, something a sound card alone is not compatible with.
Choosing the right interface
There are a fair few types of audio interface on the market offering different connections, number and types of inputs and of course price ranges. When picking one, you’ll have to bear in mind:
- How many & what kind of inputs do you want? Think about how many mics/instruments you’ll use and whether you need to be able to record them simultaneously or one by one. Also make a note of what input cables you’ll need – XLR, TRS, RCA?
- What kind of connection do you need for your computer? Simple one, most of the time its a USB, but Firebolt connections are getting increasingly common.
- Does it have phantom power? As mentioned, if you’re looking to use condenser mics, make sure it has this feature.
- How is it powered? If you’re looking for portability, make sure it can be powered by USB connection rather than requiring a second power cable!
Once you’ve got these things straight, you can start having a look around for what might work best for you.
The Focusrite Scarlett 2i2 is by far the most common entry-level audio interface – it has 2 XLR/Jack inputs, offers phantom power, contains a solid preamp and will only set you back a wad around the £130 mark (or less than £100 second hand!). If you’re looking to spend a bit more check out the UAD Apollo Twin MKII, which is a pretty cool looking piece of kit and comes with hybrid UAD-2 plugins.
At the end of the day, the best audio interfaces are the ones that work with your setup and subject to how much you are able to spend!
How to use an audio interface
We’ll now quickly run through how to set up your interface. There are lots of helpful Youtube tutorials out there if you find visuals helpful.
Connecting to your computer
You’ll be connecting your interface to your computer either via a USB port or Thunderbolt cable. It’s also most likely it will be powered by this connection too, so when it's plugged in, check for a light to see if it's switched on properly. Otherwise, you’ll need to plug it into a power socket too.
Basic setup of your interface
- Connect your interface to your monitors via output cables.
- Connect your interface to your computer.
- Adjust computer/DAW audio settings to the audio interface device.
- Connect microphone via input.
- Record in a dummy track via this selected input channel.
- Playback audio to check it is working.
- Adjust the input gain on audio interface as required.
Inputs
These are connections for incoming signals – either a microphone or an instrument, like a drum machine, either via a jack or an XLR cable. The usual convention is that signals are output on male XLRs, with input sockets being female. To test the incoming signal, make sure you start with the gain setting on its lowest and gradually bring this up – you may have a level monitor on the interface itself, otherwise you’ll be able to check the volume of the incoming signal in your DAW to make sure it’s not clipping.
Outputs
Depending on what kind of interface you have, you could have up to 7 outputs! They are:
- Headphone outputs
- Monitor outputs
- MIDI output
- Line outputs (balanced and unbalanced)
- SPDIF
- Word Clock output
- ADAT/Lightpipe/TOS Link
When you’re starting out, you’re mainly going to be using the headphone/monitor and potentially MIDI outputs. These first two are as they say on the tin – they connect to your headphones and monitor speaks and relay the audio from your computer. It’s great to use both for an A/B comparison when mixing. For more tips on how to mix, check out this article. You may also want to make use of the MIDI output – little more on that below.
Preamps
This is something you won’t see or touch, as it will be built into the audio interface. As mentioned before, they are the component responsible for boosting the low level signals from inputs. Microphones output a very ‘low signal’ – a good pre-amp boosts volume without adding much ‘electrical noise’ that also gets picked up, giving you a ‘clean’ recording. A lot of ‘lo-fi’ recordings may mimic a lack of good preamplification, giving you that fuzz effect.
Audio converters
Similarly to the preamp, you wont need to touch this element. But good quality analogue to digital converters are crucial in accurately translating the quality of the sounds between analogue and digital formats. Not only do they process the inputs, but also convert the digital signal it receives from your computer back to analogue, so that the music can be played through your headphones or speakers. This outgoing signal is often different to the initial one sent in. Say you have an FX chain on the channel you are recording in. Your DAW will have to process the raw recorded audio through this chain, which would give you a new waveform being sent back out your speakers.
Latency & Direct Monitoring
As mentioned above, latency is simply the delay between the audio signal being made and hearing it owing to the level of processing and communicating that it needs to undergo. So if you hear a delay between what you’re recording and what’s coming out of the speakers, make sure the direct monitoring button is switched on. You’ll also have to mute the channel you are recording to, but using this feature will give you near-zero latency and is particularly useful if you are working on a song with multiple tracks - such as if you need to add vocals to some backing tracks. You can play the existing track through your headphones and record the singing at the same time.
MIDI connections
This essentially allows a device to communicate with the DAW via MIDI – generally it will be used to play MIDI patterns created in a DAW on a live instrument such as a synthesiser. This way, you can trigger different patterns from your computer to play an electronic instrument.
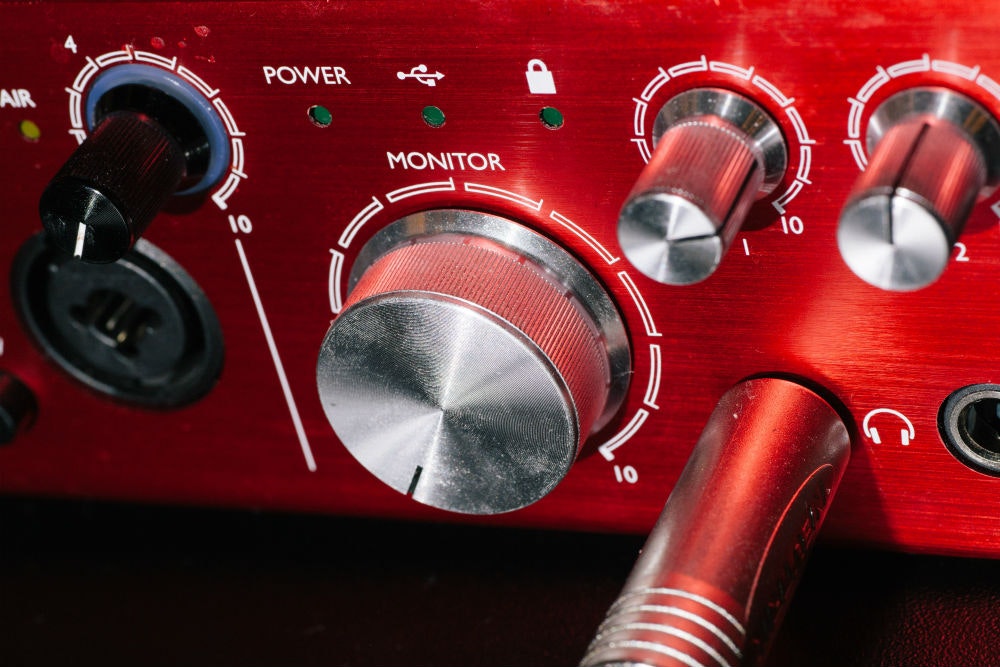
Master volume & Input Gain
There are no real audio interface ‘controls’ as such. Aside from the on/off for direct monitoring and line/mic switches, you’ll have a master volume knob, which controls the overall output connected to your monitors/headphones. You’ll also have a gain knob for each input to control the level of amplification you want to make to the signal. Almost all audio interfaces will have either a metre, or at the least a glowing light that goes green when receiving audio signal which isn’t clipping, and red when it reaches a volume that it does.
Phantom power switch
As we touched on, if you plan on using a condenser mic, you’ll want to make sure your interface has phantom power. Condensers have high clarity and sensitivity, so they are commonly used for vocals, amps and acoustic instruments. The phantom power button is often labelled as ‘48v’ on the interface.
Configuring your DAW
You’ll need to make sure your audio is configured correctly in your computer or DAW – there should be an option in audio settings to switch from your computer’s audio to the audio interface (it may do this automatically). Assuming you’re recording and you want to route the output through your monitors, make sure it's selected for input and output audio. When recording audio in, you’ll need to make sure each channel is set to the correct input.
When recording vocals
As mentioned above, using direct monitoring you can record with near zero-latency. Make sure the phantom power is switched on if you’re using a condenser mic (recommended!) and make sure to route your track through your headphones rather than your monitors, so none of the track gets picked up in the background when recording.
Common problems
Audio interfaces are pretty straightforward devices. If you are having issues with low volume and you’ve tried to correct this by gain staging, or latency problems even if you have direct monitoring switched on, it's probably a sign your interface is broken. Other things to look out for include buzzing or clicks and pops in your recorded audio or l/r stereo issues with your monitors. These are also things that may indicate your device is broken, though do be sure to check its not the mics/instruments/speakers themselves first before going and buying a new one. One thing that you may notice is loud pops somewhat randomly when the interface is connected but nothing is playing, particularly when you switch your computer on for example - this is nothing to worry about.
FAQs
Do I need an audio interface as a beginner?
You need an audio interface unless you are recording on a single USB microphone.
Is an audio interface necessary for a home studio?
An audio interface is one of the first pieces of equipment you should buy when setting up a home studio.
What software do I need to use with my audio interface?
The only software you need to use with your audio interface is your chosen DAW - Ableton, Logic, Pro Tools, FL Studio or Cubase are some of the most popular on the market.
Can I play music through an audio interface?
As well as your own productions, you can play Spotify or iTunes tracks through an audio interface, which will make for a much more enjoyable experience.
Do you need an audio interface for studio monitors?
You can use studio monitors without an audio interface but you won't get high quality audio without one.
Can you use two audio interfaces at once?
Theoretically it is possible to use two audio interfaces at once, though if what you are trying to achieve is more inputs, you’re better off just upgrading your interface.
What do you plug into an audio interface?
You plug your speakers, headphones, microphones and instruments into your audio interface.
What maintenance and upkeep is required for an audio interface?
The quality of an audio interface won't deteriorate over time, so it's fine to buy a second-hand audio interface.
So there you have it. When you think about what an audio interface is used for, it's pretty simple really. But as one of the core components to any studio and a fairly small price tag comparatively, do not think this is something you can skip out on, but do make sure you find one with suitable connectivity for you.
